LBSC Green Arrow
8
29/12/2021
Apologies for the lack of updates but it's not been a good year, what with one thing and another, and I just haven't felt like doing a great deal recently. Hopefully, that will change in the new year!
So, to catch up -
The frames were painted outside using the spray can of satin black and the insides painted red by hand.
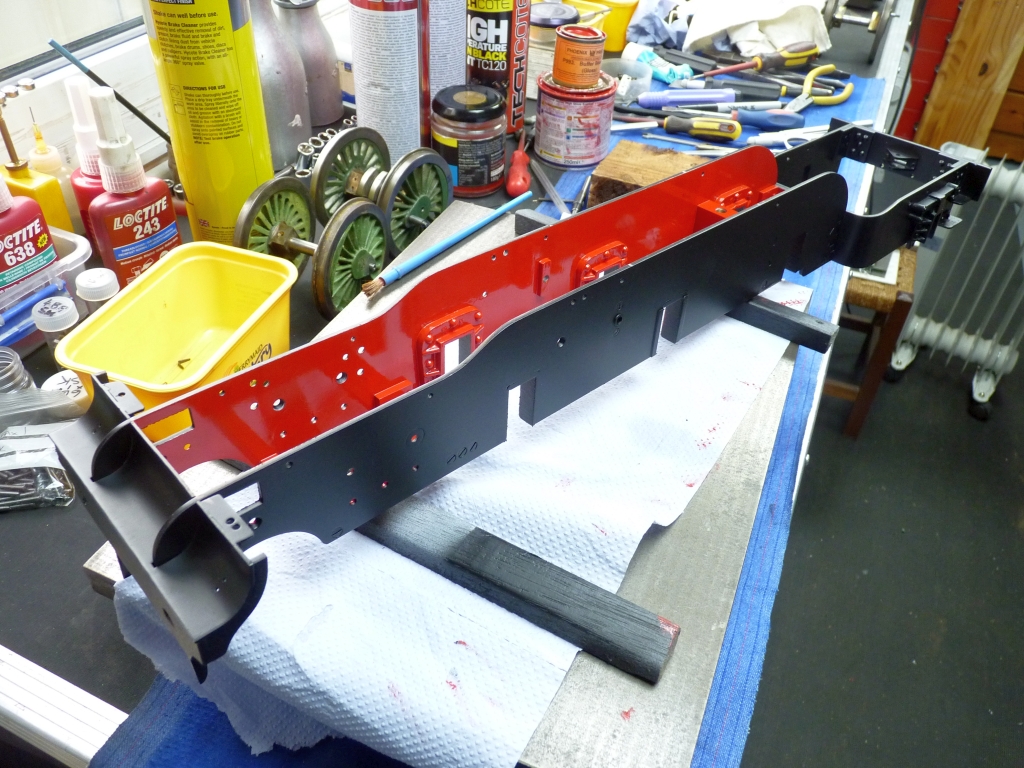
The wheels were then all hand painted with Doncaster Green from Craftmaster Paints which is my prefered supplier. They are considerably cheaper than that other well known supplier of model paints and perhaps better suited to brush painting. The only downside is that you are limited in the size tins that you can buy. In this case I had to buy a 1litre tin but it was the same price as 250ml from the other supplier. I will be painting a lot of future locos in Doncaster green!
I did have trouble getting the paint to cover on the wheels and ended up having to apply three coats. I suspect this was because I hadn't used the correct colour undercoat which is dark grey. I used the Upol Acid 8 primer which is a very light grey. It's also possible that I hadn't stirred the paint up enough before I used it.
Once the wheels and the cylinders were painted I could start assembling the chassis again. I also spent quite a bit of time cleaning up all the motion before refitting it and it came up looking nice.
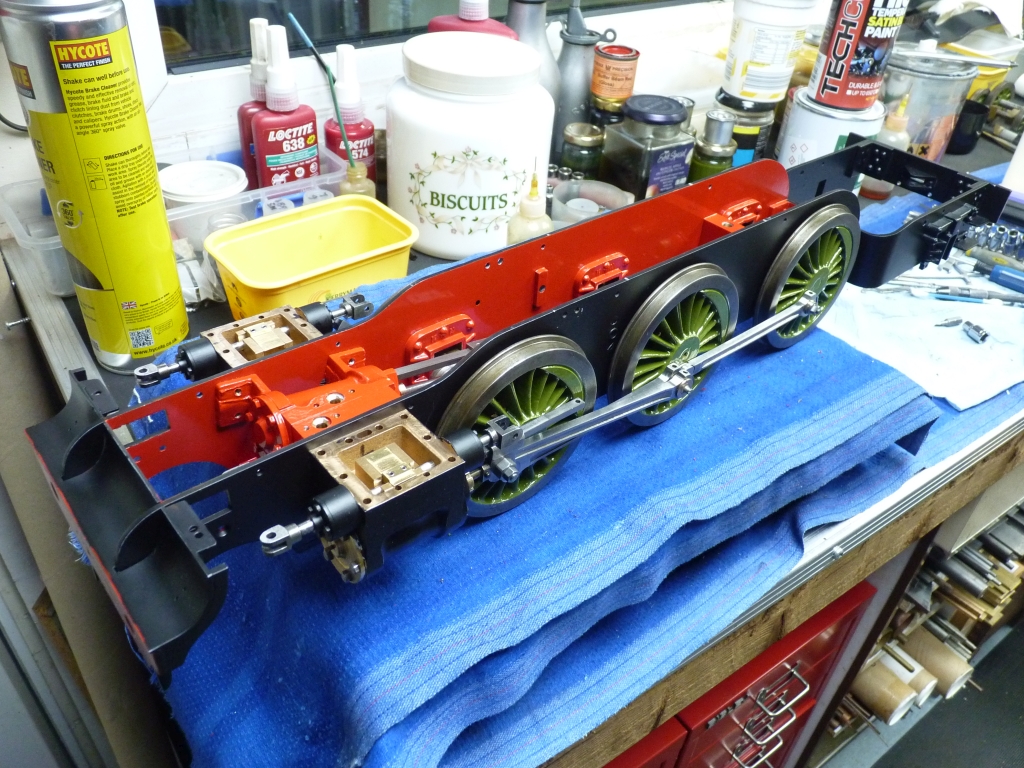
It was now that I discovered a problem that hadn't shown up before. The front coupling rod bosses were hitting the crossheads. I wondered why this hadn't happened before and then realised that when I ran the chassis on air before I had not fitted the coupling rods. The solution was to remove the cylinders again and mill a clearance on the back of the crossheads.
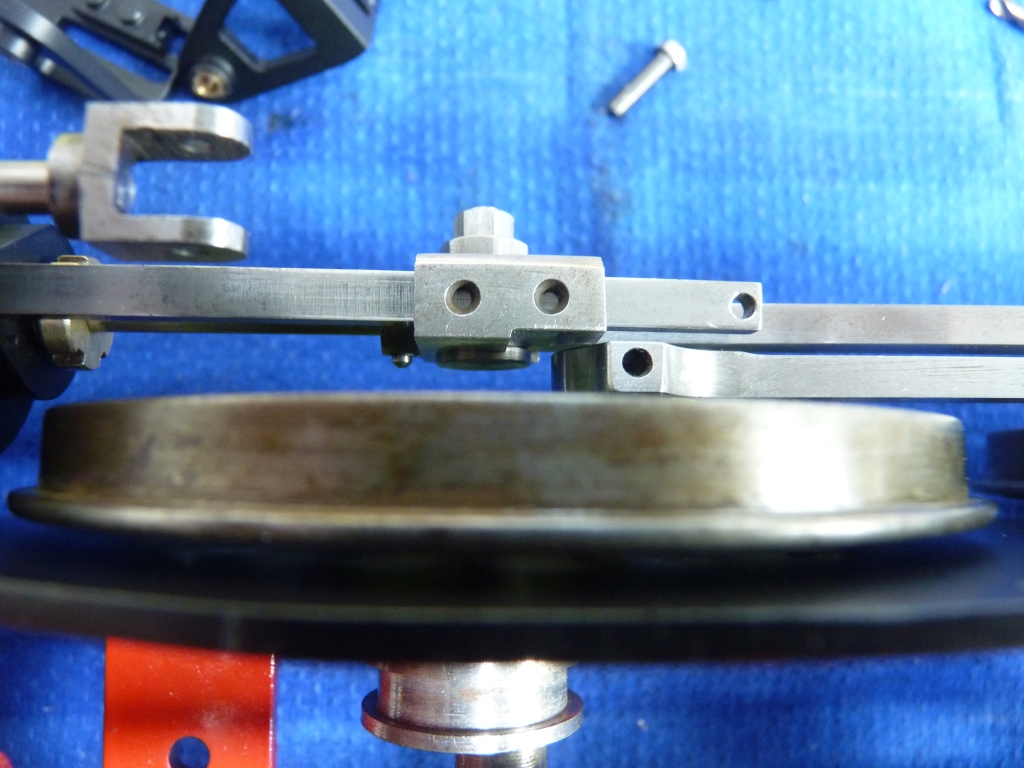
Assembly could now continue until the chassis was all back together again.
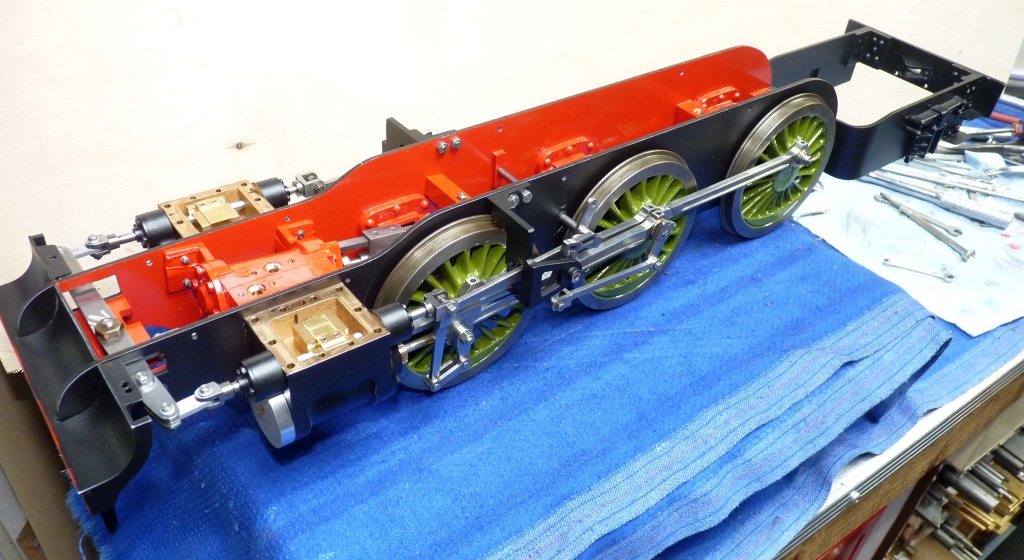
I also machined some front covers for the cylinders from aluminium bar which finish them off nicely.
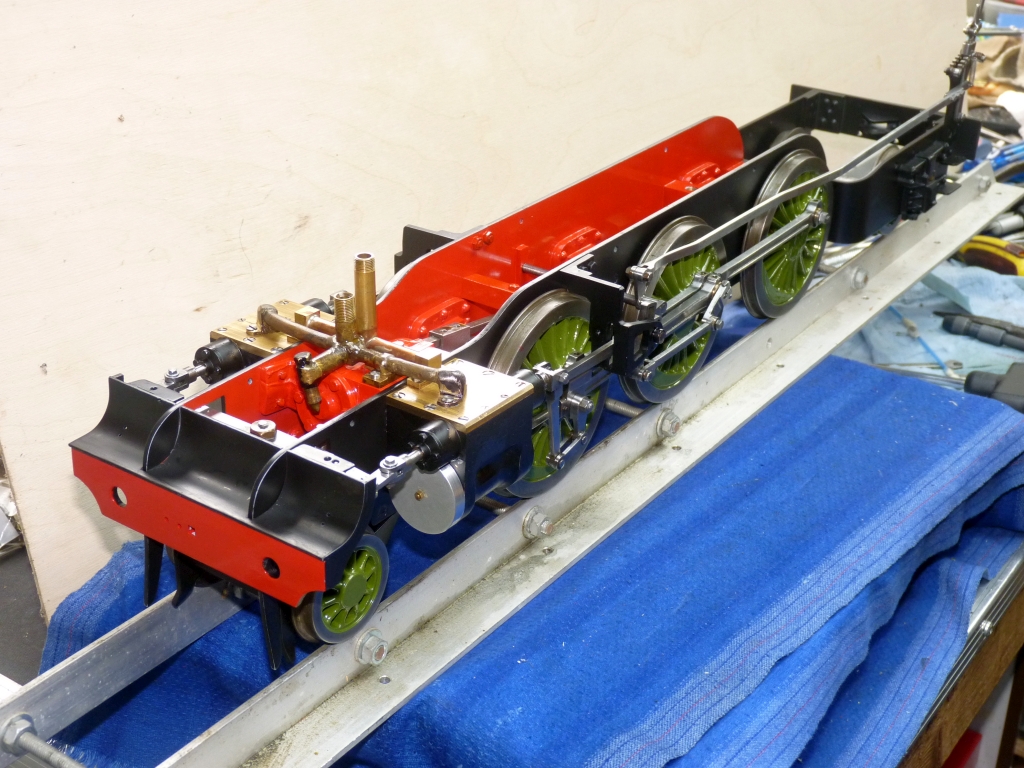
The motion was quite stiff now which was not surprising as things never go back exactly as they were originally but after running on air for a bit it soon freed up again. I did revisit the timing and tweaked it a bit as it was a bit out after the reassembly.
I realised now that I should have refitted the cylinder cladding before I had painted the cylinders because I will probably have to make new cladding and will probably scratch the paint on the cylinders getting it to fit. However, I decided to move on to the boiler next and see what that was like. If it was scrap and I had to replace it, the project may have ground to a halt there and then! I don't think that I could have faced having to make a new boiler for it.
Onto the boiler then.
The first job was to remove all of the fittings and the boiler cladding to get down to the bare shell.
That was easier said than done. I removed the screw that held the dome cover on but the dome refused to budge. It turns out that it had been soft soldered to the cladding! Then the cladding had been soldered to the boiler on the throatplate and the backhead, obviously to hold it in place. Judicious use of heat from a small gas torch soon had it removed though to reveal the boiler in all it's glory. The 'insulation' under the cladding was just some thin cardboard from a very old box that had contained some unmentionable ladies product!
The boiler actually looked quite well made and neat and tidy so I was hopefull that it would be usable.
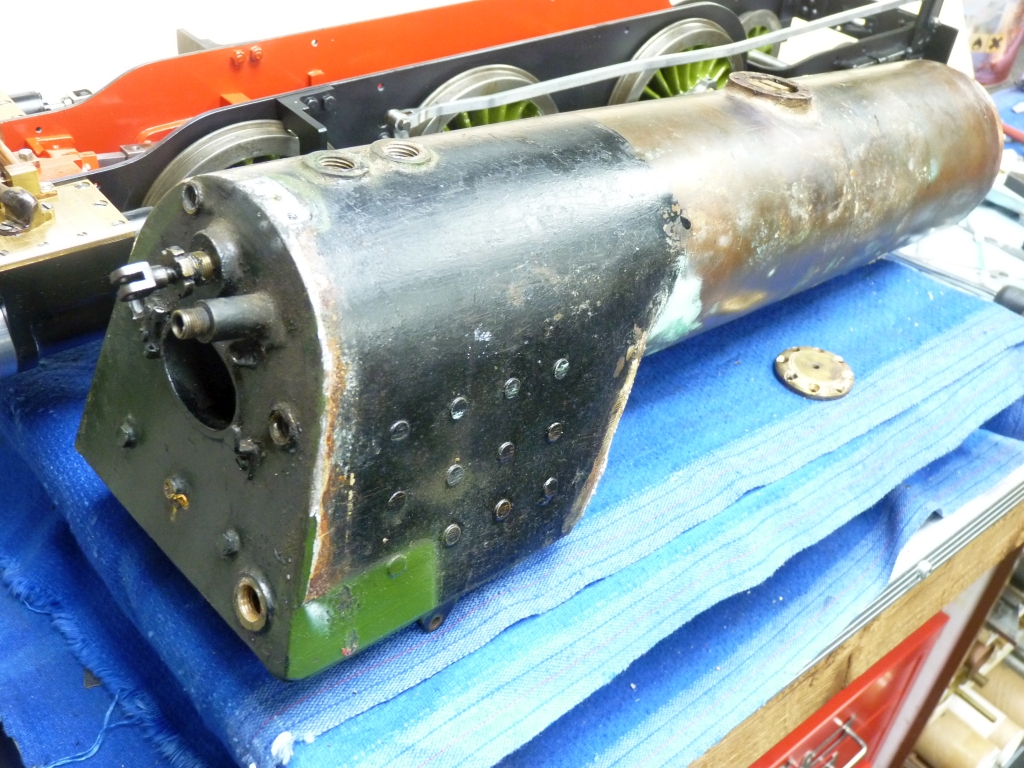
The backhead fittings all have bushes except for the blower valve which threads onto the end of the hollow blower stay. The hinges for the firedoor are screwed directly into the backhead which is fine but the screws are probably brass. I may replace them with some bronze ones if possible.
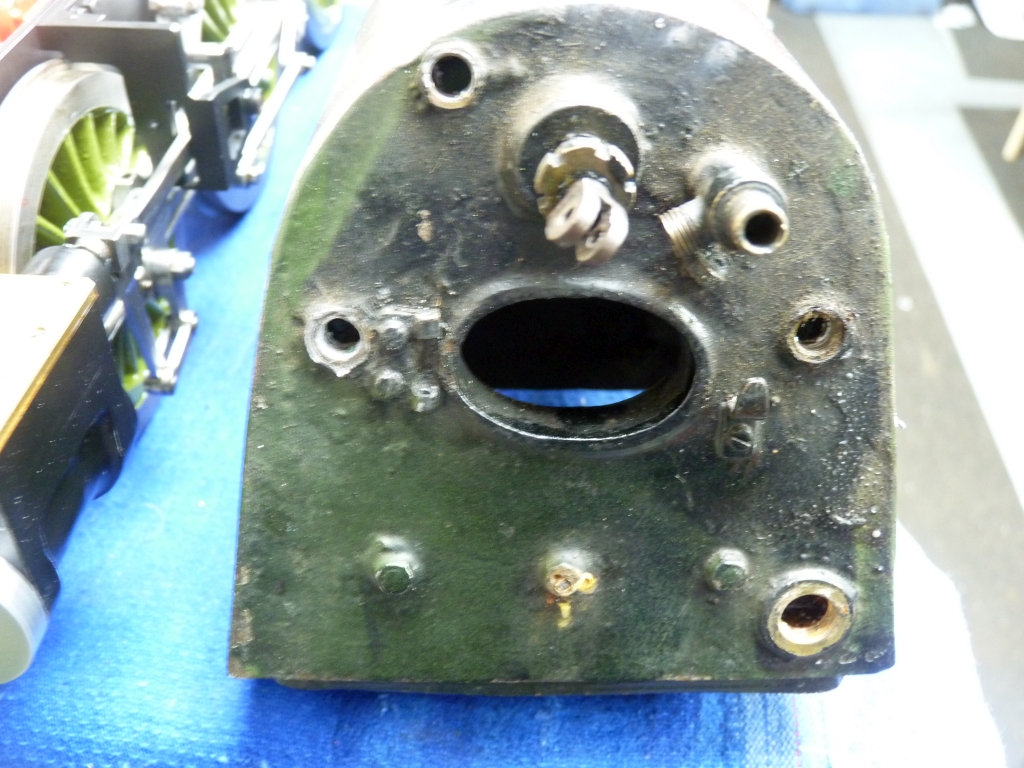
The centre stay at the bottom of the backhead has been drilled and tapped for a bolt that I think holds a latch to retain the dropping part of the grate. Unfortunately, a steel bolt had been used that has rusted away.
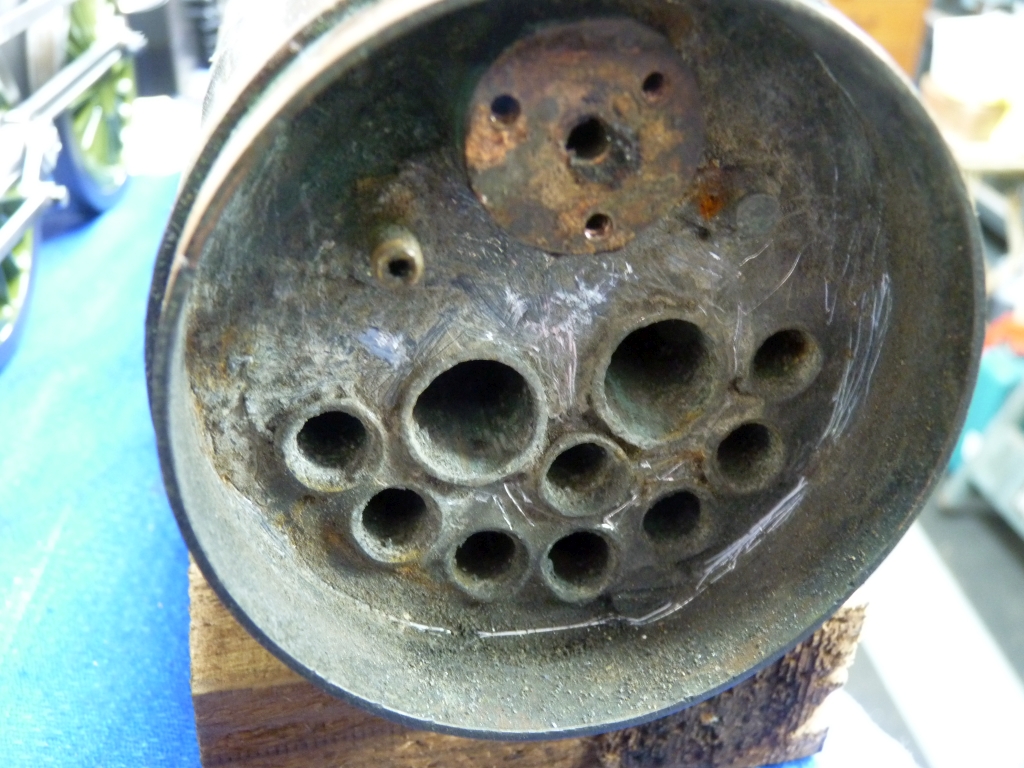
The smokebox tubeplate is not so pretty and seems to have a large amount of soft solder around the tubes. I would guess that there may have been a few leaks there when the boiler was initially tested and the builder just put loads of soft solder on to cure it. I'll clean it all up and see what it's like after that. The tubes are definitely silver soldered so I can't forsee any problems. The fitting for the superheater header threads into the tubeplate and I think that it was the gasket between that and the superheater header that was leaking badly when I first tested the boiler. I'm not sure what the screw is for in the bottom of the tubeplate.
The regulator is a sliding block type as per the LBSC drawings and I don't hold out much hope of it sealing very well. At the moment though, I can't see an easy way to remove it. The regulator body is held to the boiler barrel by a countersunk screw in front of the dome bush that has been soft soldered over to seal it. Even if I remove the screw, I still don't see how to get it out of the boiler! It obviously went in there though, presumably after the boiler was built.
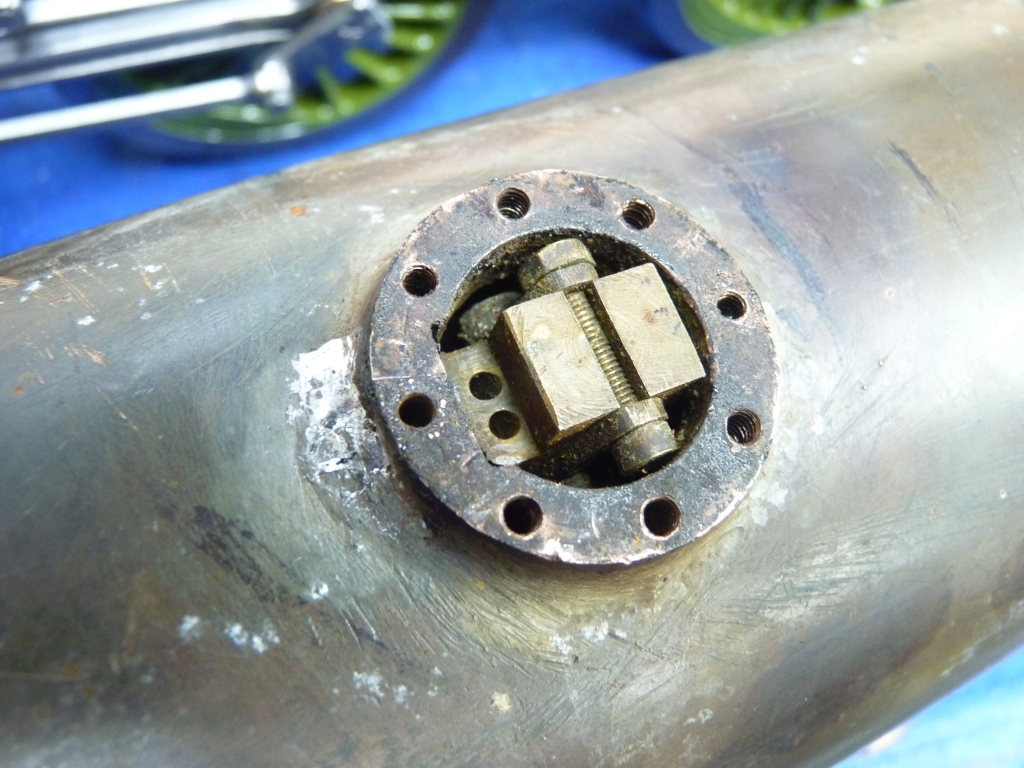
The firebox has the LBSC combustion chamber so fingers crossed that there are no leaks in that! The firebox and the stays all look fine. I just hope that the stays are not brass. If they are, I'll just run the boiler until they start to fail and then replace them. As they are threaded and soft soldered that would not be too big a job.
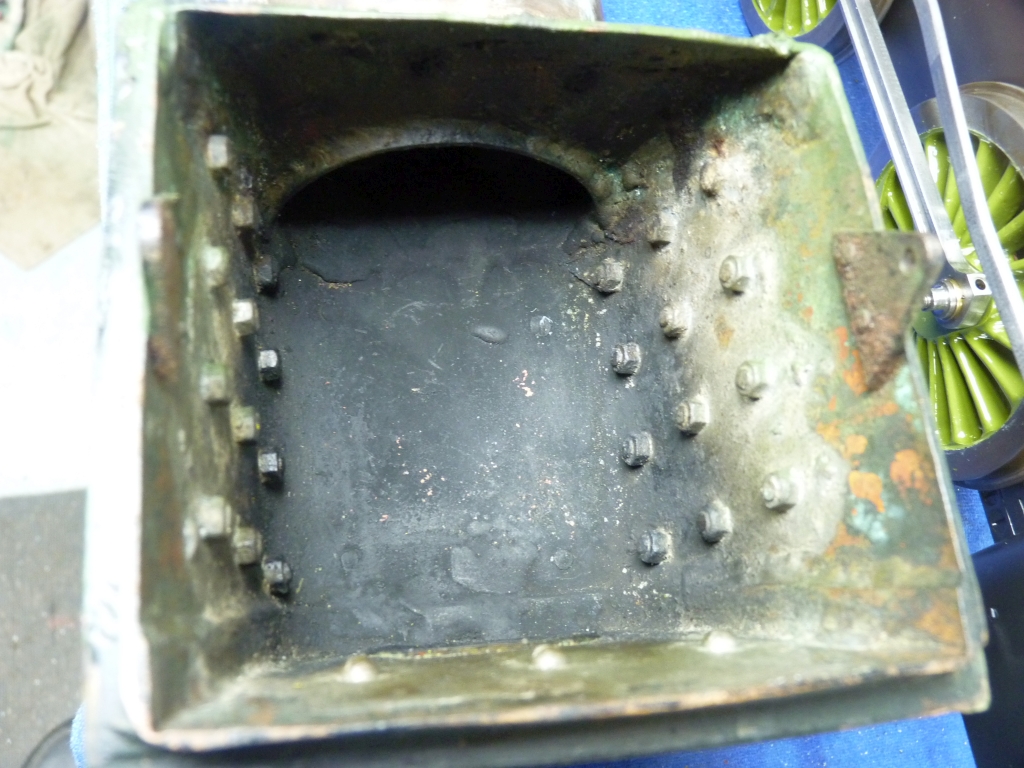
After a good clean up the boiler started to look pretty good. There are a few splodges of soft solder on the backhead, mainly around the blower valve where it has been sealed and also around the firedoor hinges to seal the screws.
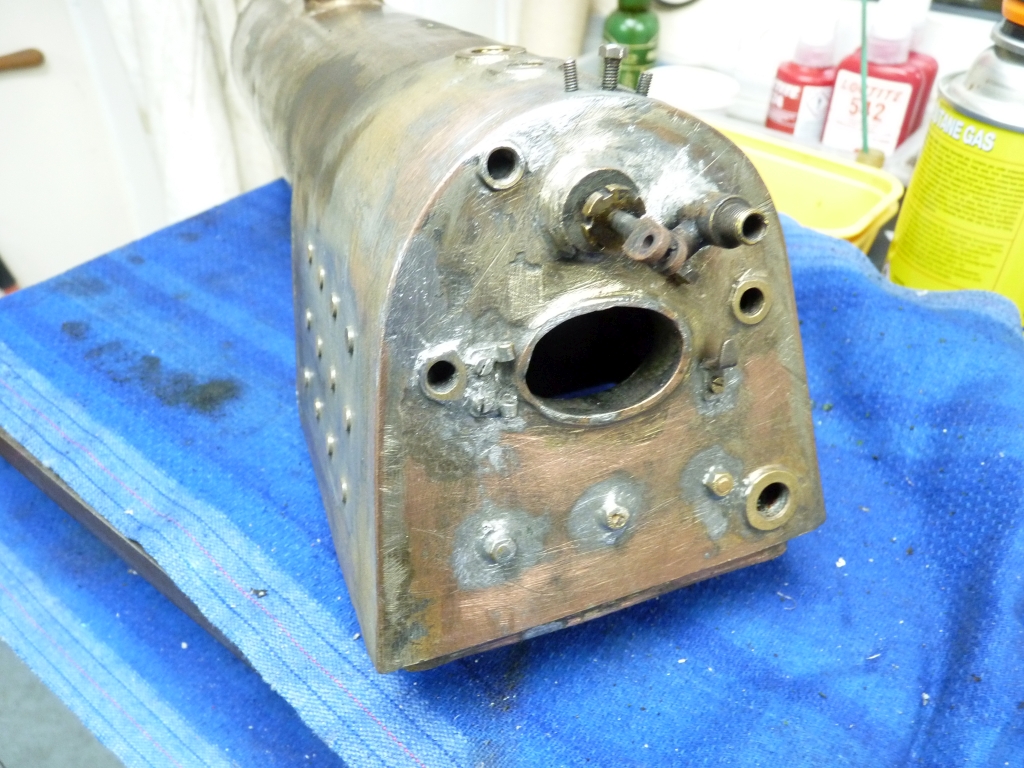
I would guess that the solder used would have been something like Tinmans solder. I doubt that Comsol or similar would have been around at the time that this boiler was built.
The shell and the stayheads look very nice.
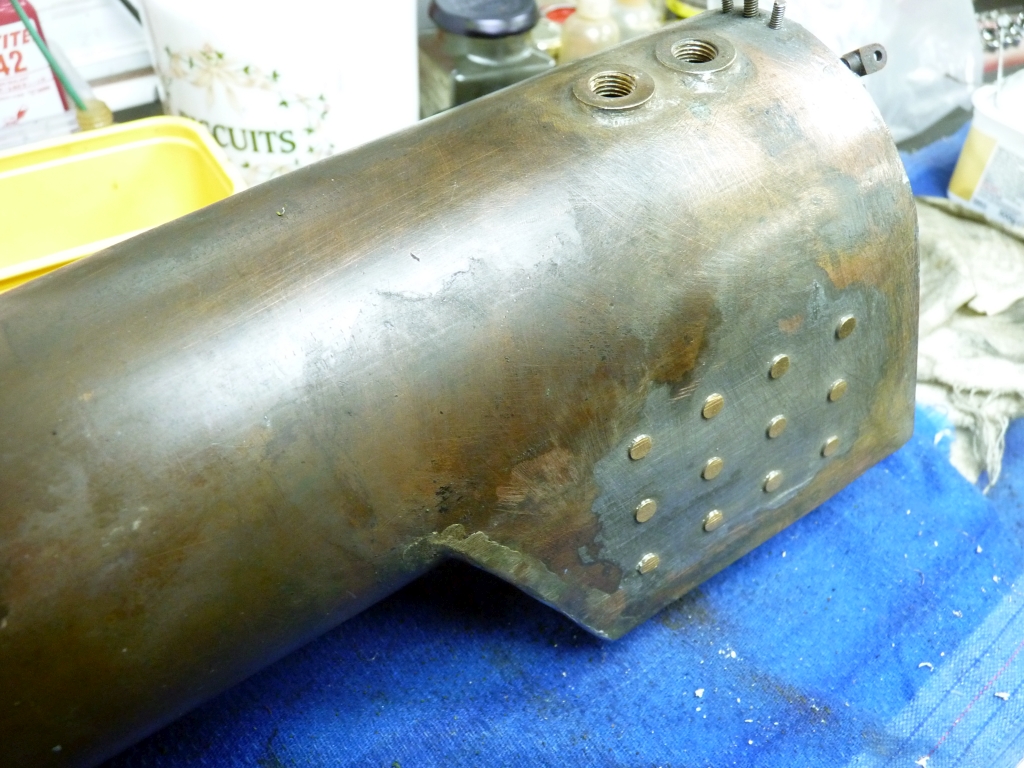
The front tubeplate is definitely the worst part but I think it will clean up ok.
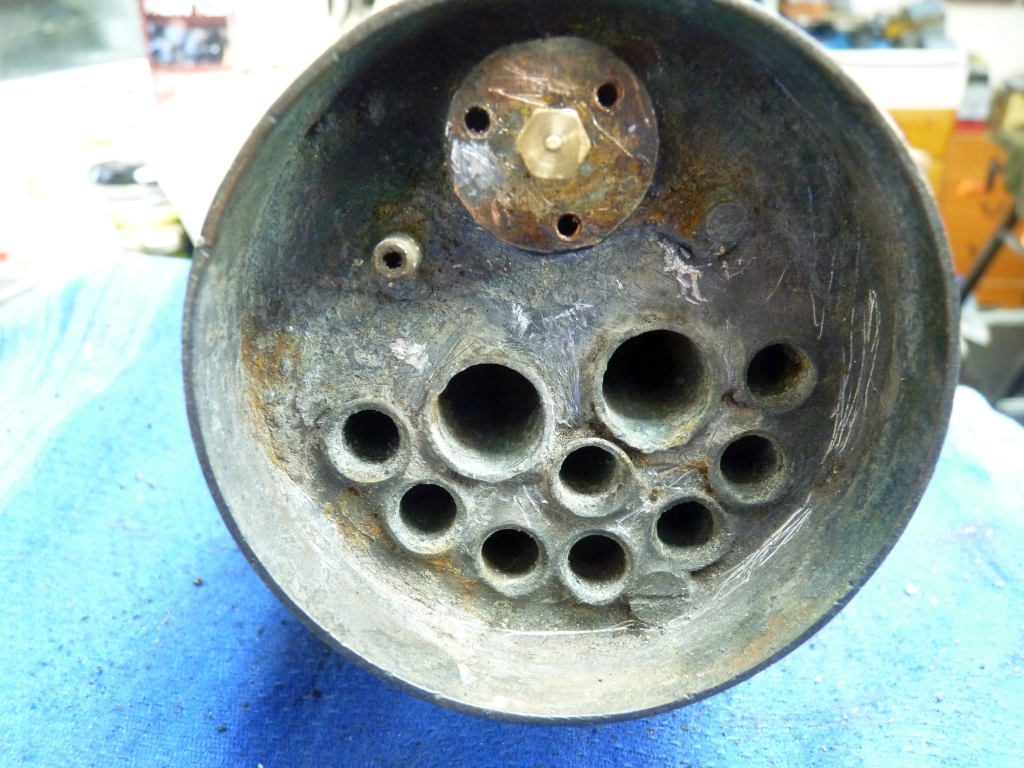
After making up some brass blanking plugs and refitting the dome cover it was time for a hydraulic test to twice working pressure - 160psi for 80psi working pressure.
This turned out to be much better than I was expecting with only a few very small pinhole weeps - a couple on the blower valve where the soft solder hadn't taken properly, one on the top of the firehole ring, a very tiny leak on the wrapper on top of the back head where it looks as though a screw had been used to blank off a hole, and both the stays on the front tubeplate had tiny weeps. Nothing bad at all. None of the firebox stays leaked and the combustion chamber was fine, much to my relief. I was surprised about the stays as I was sure that a couple had shown leaks on my initial test but they were bone dry now.
So, it looks all good for the boiler. All it needs is a few spots of soft solder to cure the tiny leaks and we should be good to go.
I will be replacing the cladding as the original was steel which is showing signs of rust. It will have to be repainted anyway as the original paint got well and truly scorched where I had to use the gas torch to remove it! A shame really as the paint and the lining on the boiler bands had been very nicely done.
So that brings the rebuild up to date. Hopefully, there will be more updates in the new year.
20/10/2024
Well, it's been nearly three years since I did anything on Green Arrow! I've been busy with other things so haven't had the time. I've completed the restoration of Southern Maid, put up a new shed and filled it and have been designing three new locomotives in 2½" Gauge.
I finally moved onto the boiler but things are not looking as good as I first thought. As soon as I fix one leak, another two appear! Worse still, a couple of small leaks have appeared in the combustion chamber. The problem is that the original silver soldered joints have small pin holes in them and the soft solder caulking on the stays etc. was not very well done. Repeatably heating up the boiler to resolder the leaking stays etc. has disturbed other joints and made those leak as well. None of the leaks are large, just tiny pinhole weeps that only appear at higher pressures.
The front tubeplate took several attempts to get pressure tight. I cleaned off all the original soft solder and that revealed several more leaks so I ended up covering nearly all the tubeplate in soft solder again to seal them. The screw at the bottom was also leaking so I removed it, cleaned out the threads and replaced it with one made from bronze. The solder I used is lead free plumbers solder. This melts at a higher temperature than the original soft solder that was used but not as high as Comsol so is a bit easier to use. You just have to be more careful to maintain the water level in the boiler.
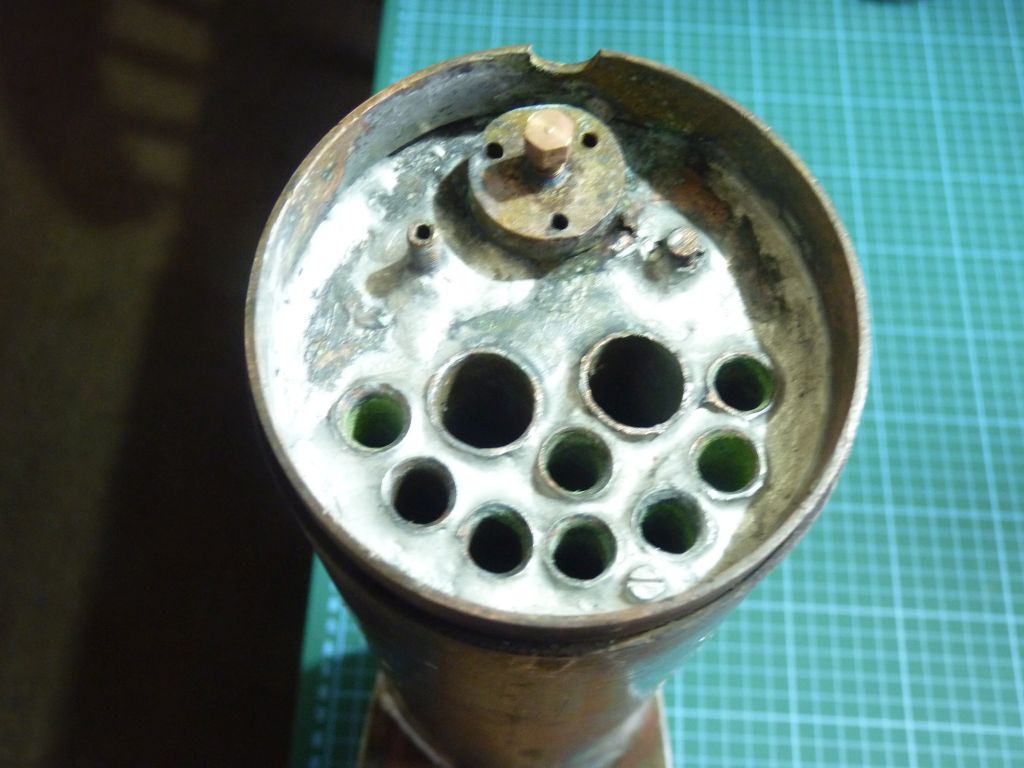
Getting the surfaces clean enough to solder was a big problem. The metal was dirty and I resorted to using stainless steel wire brushes in the Dremel which worked quite well and scratching the metal with a scriber to remove the oxides. Plenty of Bakers fluid flux helped as well. The problem with Bakers fluid though is that it evaporates straight away and you have to keep adding more. Maybe a paste type flux would be better?
The backhead leaks took several attempts as well, again getting the surfaces clean was a struggle. The middle stay at the bottom of the backhead had a bad weep and this was the one that had been drilled and tapped for a bolt. The tapped hole had not been drilled in the centre of the stay and had broken out through the side into the water space. I ended up heating up the stay and managed to unscrew it fairly easily. I then made a new one from bronze and refitted it with a new bronze nut. I did go up a size to get nice new clean threads in the boiler.
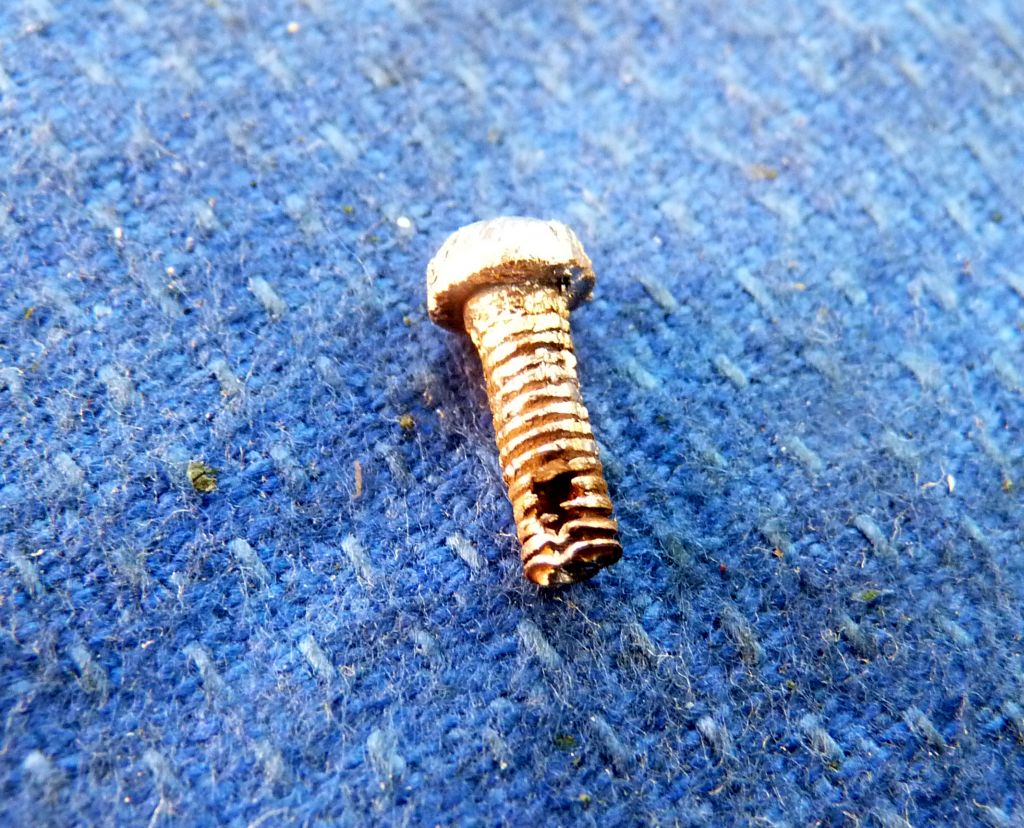
Damaged Backhead Stay
The leaking stays inside the firebox proved to be a bit of a nightmare. As soon as I fixed one leak, another appeared. I think most of them are going to need resoldering. The problem may be that I have been using a torch with a fairly large flame so heating up quite a large area. I think I will try using a burner with a needle flame to concentrate the heat on a smaller area. Cleaning the joints was especially difficult this time as some of the stays were hard to get to. A stainless steel wire brush proved useful with a lot of elbow grease. The inside of the firebox was really dirty and it did look as though the boiler may have been fired at some time even though the loco has obviously never been run. I did begin to suspect that this may be a 'secondhand' boiler that had come from another loco.
This was the time when I noticed water coming from inside the combustion chamber once the pressure got above 100psi. One of the leaks is on one of the water tubes at the firebox end of the combustion chamber and not quite impossible to get to but there is another leak further in towards the tubeplate which I can't see. I had forgotten that I have a small endoscope that I bought some time ago (thanks to Dan for reminding me!) so I can use that to get a better look.
That is as far as I have got so far. I had to stop work due to the Model Engineering Exhibition which tied me up for a week and also I am busy repairing one of the club electric locos which needs new gears on the motors and axles.
16/05/2025
Well, nothing much done on Green Arrow since the last update. I did give the boiler a good soak in pickle which got it quite clean. I also heated up the front tubeplate to get rid of all the excess soft solder to give a better look at the joints. Due to other things, like finishing off the design and drawings for a 2½" Gauge version of the Lynton and Barnstaple 2-6-2 'LYD', work then stopped. I was beginning to think that I would end up having to make a new boiler and I just didn't have the enthusiasm at the moment.
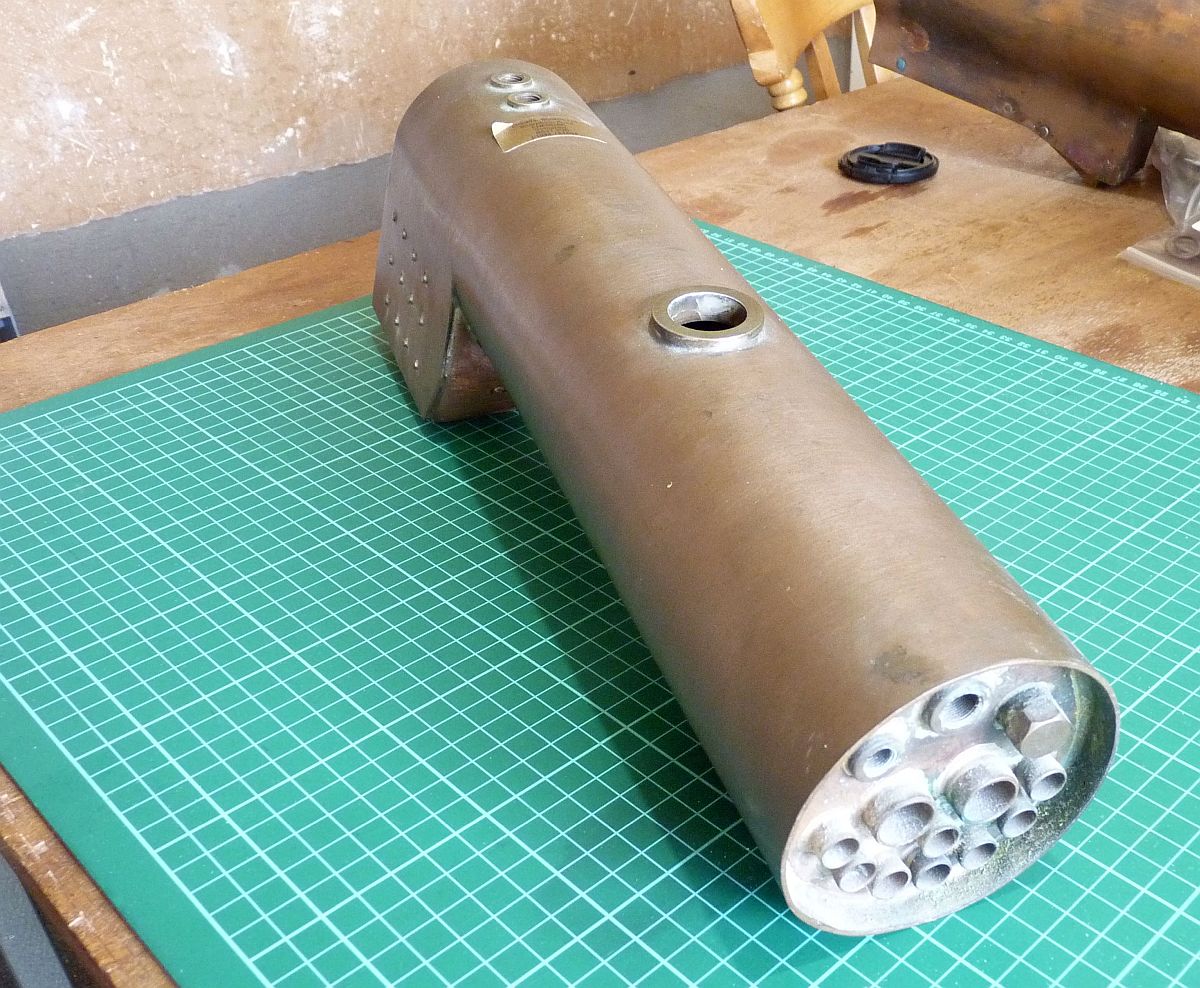
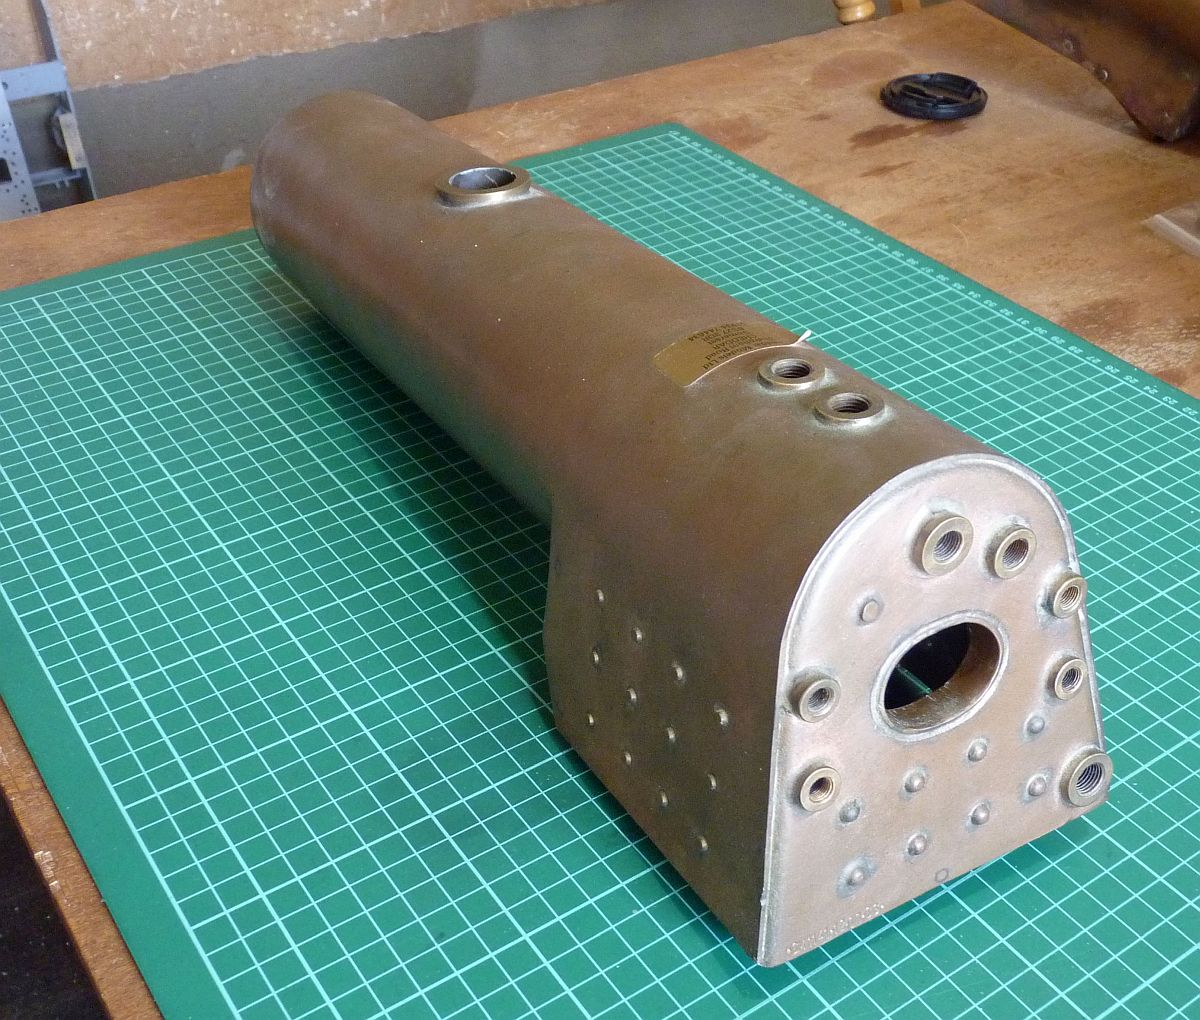
The other day I received an email from a former member of the N25GA who said that they had a new and unused boiler for a Green Arrow and did I know anyone who might be interested in buying it. They wanted £500 for it so I bit the bullet and bought it myself. The price was good for a commercially made boiler and wasn't a lot more than the cost of materials to build a new one. The seller had started to build a Green Arrow himself but decided that he was never going to finish it so didn't need the boiler anymore. He had finished the chassis and decided to just keep that and run it on air. He also had a virtually complete tender which he threw in with the price of the boiler. A friend of mine is also building a Green Arrow so I will pass the tender onto him to use for his.
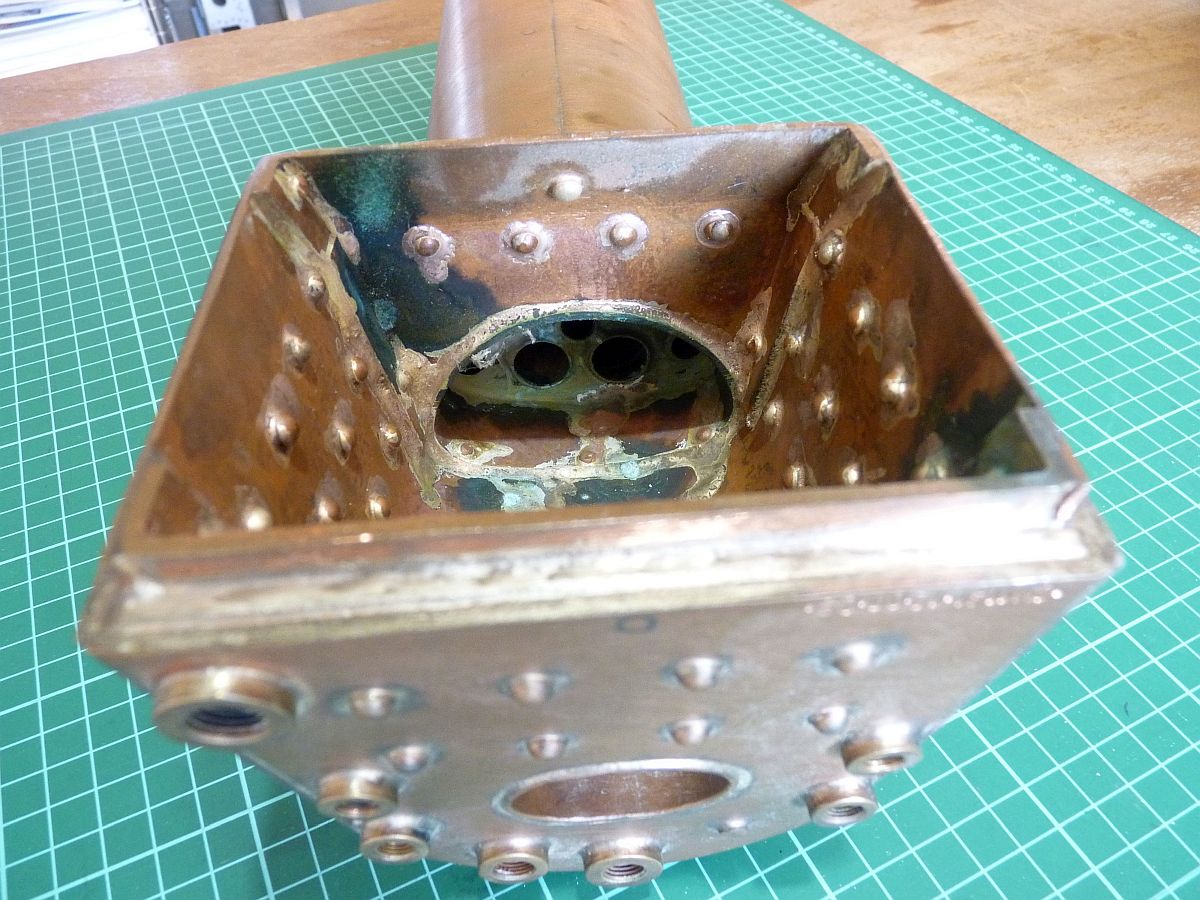
The boiler was made by Cheddar Models back in 2012 if I read the boiler number correctly. The seller did have the original paperwork somewhere and will post it to me if they can find it. They lived only 15 miles from me so I went over to collect it. It's very neatly made and will save me perhaps wasting a lot of time trying to repair the old boiler without success and ending up making a new one anyway.
The boiler does have a combustion chamber but it is only about 1 inch long so doesn't have any vertical water tubes. This will allow me to fit decent full length superheaters which is not possible with the original design. It also has a foundation ring between the front of the firebox and the throatplate. In the original design the firebox tubeplate butts up to the throatplate giving only a narrow gap for water circulation. One thing I was pleased about is that the backhead has an extra bush fitted so that two water feeds can be fitted. The original design had only one so the tender handpump has to feed through the axle pump into a single clack, a method that is used on some 2½" Gauge designs but one that I am not very keen on. Also, some boiler inspectors will not accept this as they consider it as only one water feed instead of two. You can get around this by fitting a double clack into the one bush which is what I would have done if I had managed to repair the old boiler.
There is also another spare bush that could be used for an injector feed if necessary.
The new boiler -
I won't be able to get back to Green Arrow for a bit yet as I have another couple of projects to get out of the way first but at least this is a big step forward.
The seller also had a part built Bassett Lowke Fying Scotsman that he wanted to pass onto someone to perhaps finish off so I came away with that as well! I will see if I can find someone who will actually finish it rather than just take it and then do nothing with it.
To be continued